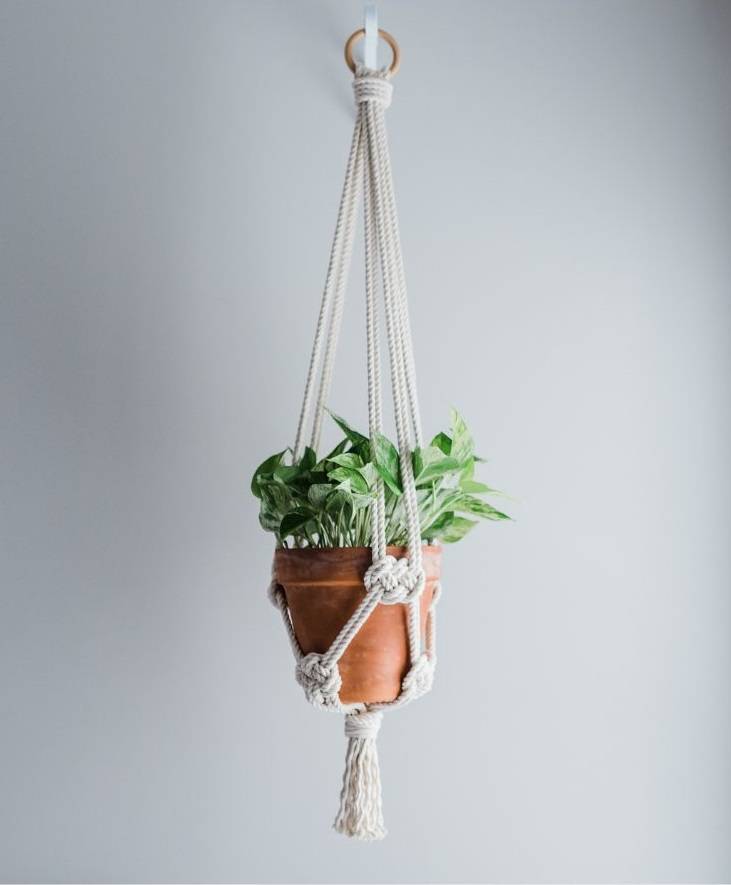
DIY Macrame Plant Hanger
Beginners Tutorial
(+ Video)
Innovation & Quality
Developing and supplying premium-quality, sustainably grown, consumer products
100% Natural
Organically Grown and Ethically Sourced
hemp and other natural fiber products
Shipping
We offer fast shipping
Your order out within 1-3 days
Wholesale
Visit our wholesale portal to register or login to your account
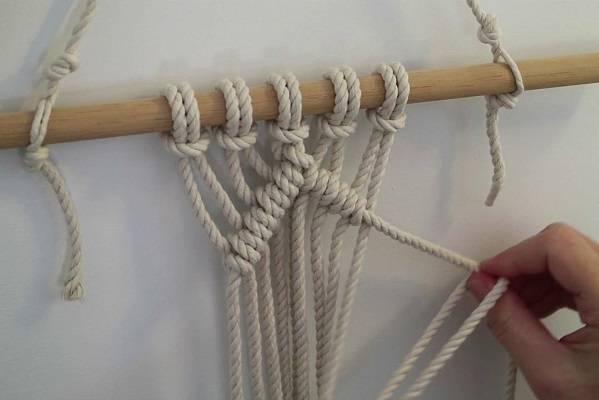
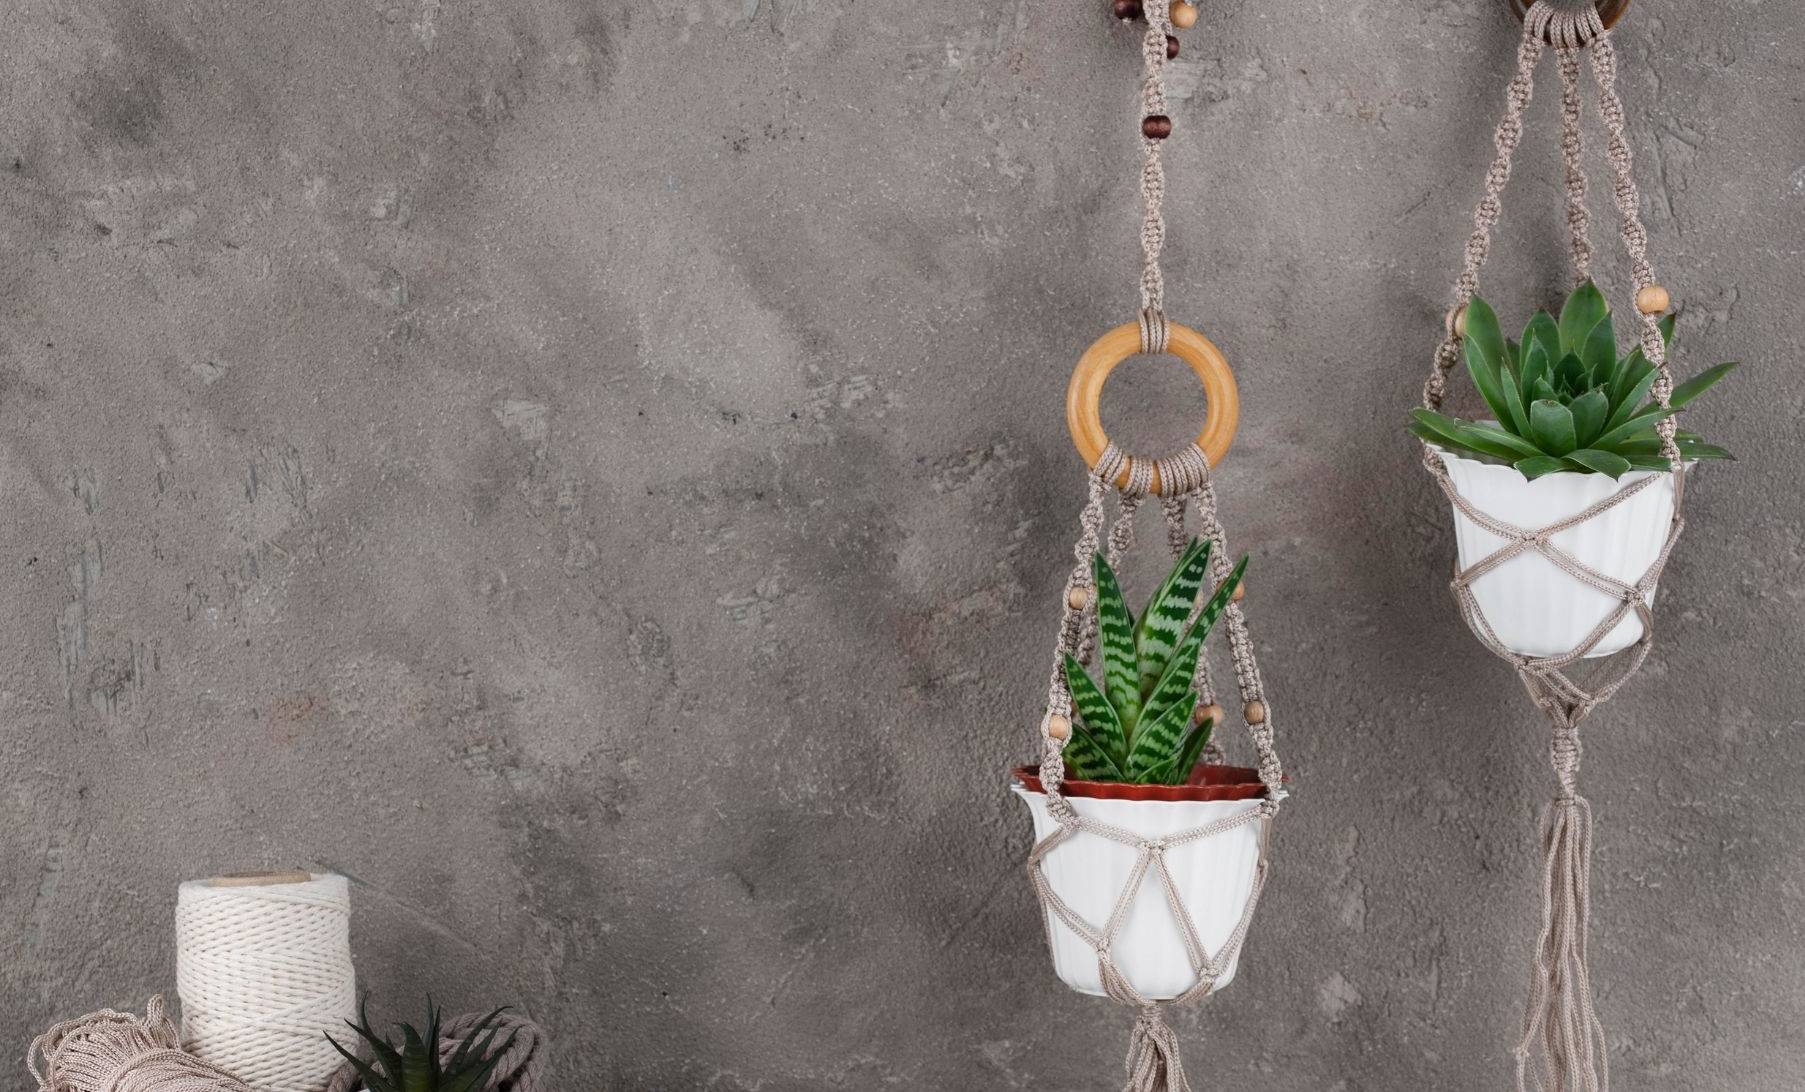
As the perfect small-space solution, a macrame plant hanger can be hung on the wall or from the ceiling and free up shelf space for other items. Making a plant holder may seem daunting at first, but when you learn several basic knots, you will be able to create amazing art that will bring style to any room. Follow our instructions for macrame plant hanger by watching our 12-minute video tutorial – it does not require special skills or fancy tools. All you need is will and a little time to practice, as practice makes your art perfect. The plant hanger knots used in this tutorial are overhand knots, square knots, half square knots, and gathering knots.
Step-by-step Macrame Plant Hanger
With Hemptique, your DIY plant hanger will look so cute and will allow you to show off your crafty side. Once you see how easy it is to make, you will be making planters in a variety of sizes and colors. Although they are simple to make, the result is more than simple. With so many plant hanger patterns, you can easily find the right for you. So, let’s jump on to supplies:
- 2mm hemp cord: 6 cords measured approximately 5 feet long
- 1mm hemp cord: 1 cord measured 30 inches long (in dusty pink)
- Scissors
1) To start your project, take all six cords and fold them evenly in half to form a loop up top by tying a standard overhand knot. Hold all six ropes together, take them and tie a simple overhand knot.
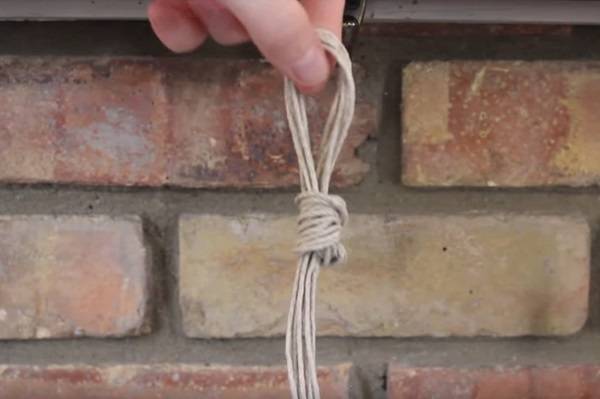
2) To smooth out the knot, take each rope and pull it individually to get the neatly looking knot.
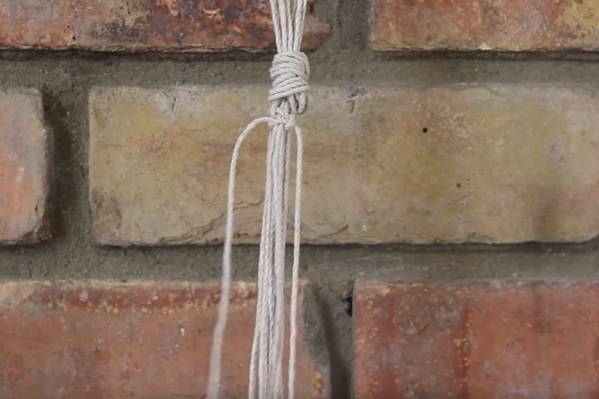
3) You have a nice loop up top that you can hang up your plant hanger from.
4) Now it is time to tie the rest of the mini-plant hanger. You need to work in sections of four ropes to tie square knots.
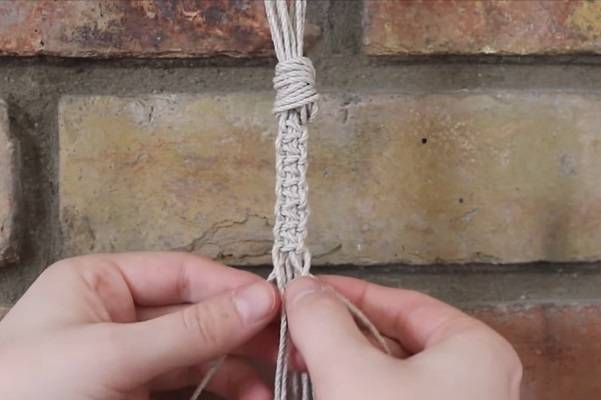
5) Take the first four ropes you want to begin working with. Take the rope on the far right side and cross it over the two in the middle to make a loop on the right. The left string goes over the right one, behind the two in the middle, and through the loop. Give it a nice tug to tighten it. Take the left side and send it over the two in the middle to form a loop. The side on the far right then goes over the left rope, behind the two in the middle, and through the loop. Pull it tight.
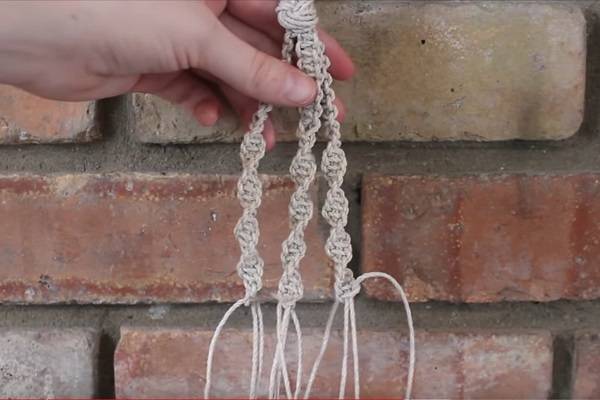
6) Repeating the same process, make six square knots in the row using the same four ropes.
7) Take the two ropes on the outer sides and switch them with the strings in the middle. Take them over and just place them in the middle.
8) Now we are going to tie a spiral pattern using half square knots. Take the right rope, cross it over the two in the middle to form a loop, and the left rope goes over the two middle ones, behind the two in the middle, and through the loop. Give it a nice tug to tighten.
9) Keep repeating these steps – again, take the rope on the right side and cross it over the two in the middle to form a loop. The left rope goes over the right, behind the middle two, and through the loop. Pull it tight and repeat.
10) As you form the half knots, you will notice that it will start to spiral in a really interesting pattern.
11) Keep tying spiral knots until you have made bout three and a half inches of the spiraled section.
12) Once when the first section is completed, we are going to repeat the exact same pattern two more times using sections of four, like the first one.
13) Rotate your plant hanger and start the next section (repeat steps 5-11) – you will have to make six square knots and three and a half inches of the spiral section.
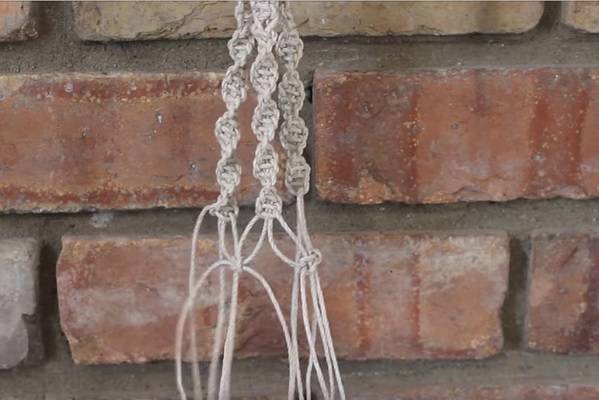
14) Now we are going to connect all the sections together with another square knot. To do that, take two ropes from each little section and use groupings that are next to each other. Go down about one to two inches and tie a square knot. Once again, take the far right rope, and cross it over the two in the middle. Put the far left over the two middle ones behind them and through the loop and tighten it. Then take the left side to cross over the two in the middle; the right goes over, behind, and through the loop.
15) Repeat the same process all the way around to form the basket.
16) The more space that you leave from the end of the spiral knots and between the square knot means bigger pot you can put, so adjust the size based on the size of your pot.
17) To finish the basket, we are going to toe a gathering knot. Leave about two to three inches of space between the square knots to tie the gathering knot down below.
18) Take another rope and fold it in half, so you get one short side and one long side with a loop that hangs below. Place it right with the strings you want to gather together and hold it with your thumb.
19) Take the long side and start wrapping it around all the gathered strings. Once you have the desired length of the gathering knot, take the long end and stick it through the loop. Take the short string and pull it to give it a nice tug. Pull everything up and through the gathering knot to secure the knot.
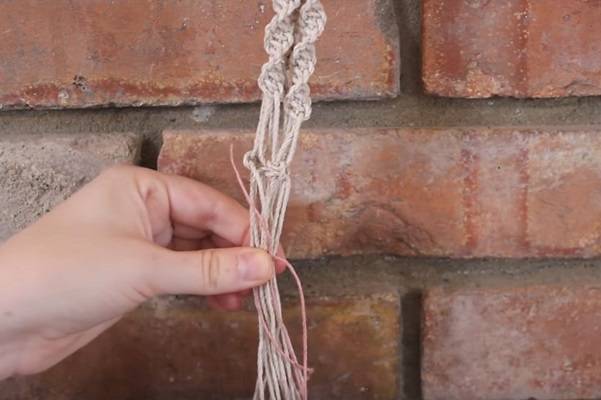
20) Take the pair of scissors to trim the remaining ends of the gathering knot.
21) Trim the remaining ends of the hanger to make them as short or as long as you want.
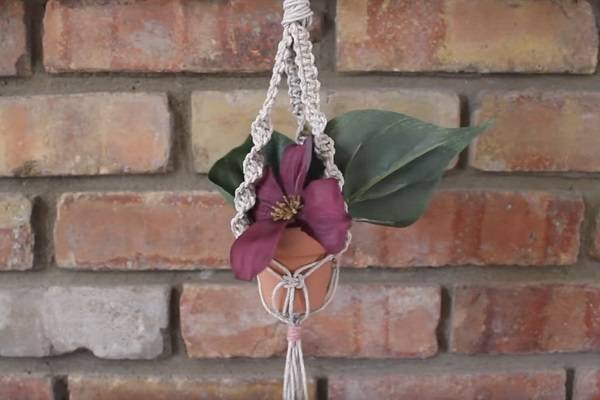
22) Take the pot and fit it into the basket, and your mini plant hanger is done.
How to Start a Macrame Plant Hanger? With Right Supplies
Hemptique is here to present you with high-quality cotton and hemp supplies – the first thing you need to start your macrame project. Our #48 Hemp cord in color Natural and #20 Hemp cord in color Dusty Pink are favorites among the crafters. They are polished to eliminate stray fibers, enhance wonderful colors, and maintain strand consistency.
Cords are made of 100% hemp – they are biodegradable, durable, strong, and oil-free.
These multipurpose hemp cords are ideal for all kinds of crafting!
How to Hang a Macrame Plant Hanger?
You can hang your plant hanger and bring life to a dull space in many ways. The glorious green foliage not only brightens up your space, but the creative way you hang them can also help add a touch of style to your home. We compiled a list of methods – there is something for everyone, even if you do not want to drill holes in the walls.
A Tension Rod
Although they are used to hold up drapes, tension rods are a cheap and effective way to hang plant hangers. They work by gripping the wall on either side. Once it is in place, you can display as many plants as you like. You can even find a plant pole with sliding hooks that go from floor to ceiling, so you can put it anywhere in your home.
A Clothes Rack
Repurposing an old clothes rack or buying a brand new one could showcase your green beauties in one stylish place. It will certainly make watering an easy task, especially if you put a plant humidifier at the bottom of the clothes rack. Opting for a rack with one or more built-in bottom shelves can give you more surface to show off your green-fingered skills. A cheap towel rack will also do the trick.
Hat or Coat Stand
If you have a small and narrow corner you want to liven up, a convenient coat or hat stand is a super-simple way to hang a series of cool hanging plants in hangers. Just make sure to get the stand with hooks that are long enough and stick out straight from the center instead of at an angle. These are particularly suitable as your propagation station.
Ceiling Hooks
If you want to hang a heavier pot, ceiling hooks are the right choice. Most of them can support up to 22 lbs of weight, so it is a very efficient way to hang plant hangers. You will need a drill and drill bits, and a little skill. Ensure you do not drill too close to the wall, as you do not want your plant hanger with the pot to bounce back and forth onto it.
Adhesive Hooks
For those who do not want, do not have the skill, or tools to drill ceilings, adhesive wall or ceiling hooks could be your first port of call. They can be hung from various horizontal or vertical surfaces made of wood, metal, glass, or even marble. As they can hold up to 22 lbs each, they are an ideal way to show off your glossy green-leaved beauties in all sorts of places, from the bathroom ceiling to the underside of a shelf.
Rustic Wooden Ladder
A wooden blanket ladder is a great choice to display your pots of foliage or flowers. Using treads as hanging rails is ideal for any remote corner. Combined with S-hooks or chains, you can make a vertical hanging garden look.
Macrame Hanging Plants
Plants have always been a part of people’s homes, so people are learning how to maximize their space by taking their plants up into the air. Although those pots are a bit harder to reach than your standard potted plant, there is nothing more beautiful than looking at the living greenery upon waking up.
- Devil’s ivy
- Boston fern
- Heartleafphilodendron
- Spider plant
- English ivy
- Mistletoe cactus
- String of pearls
- Morning glory
- Rat tail cactus
- Nerve plant
- String of hearts
- Oyster plant