Fraying depends primarily on weave density, yarn characteristics and finishing, not fiber type alone. A loosely woven hemp fabric may fray more than a tightly woven cotton fabric, while a stable hemp weave may hold its edges relatively well.


How to Stop Hemp Fabric From Fraying: Seam Finishing Methods
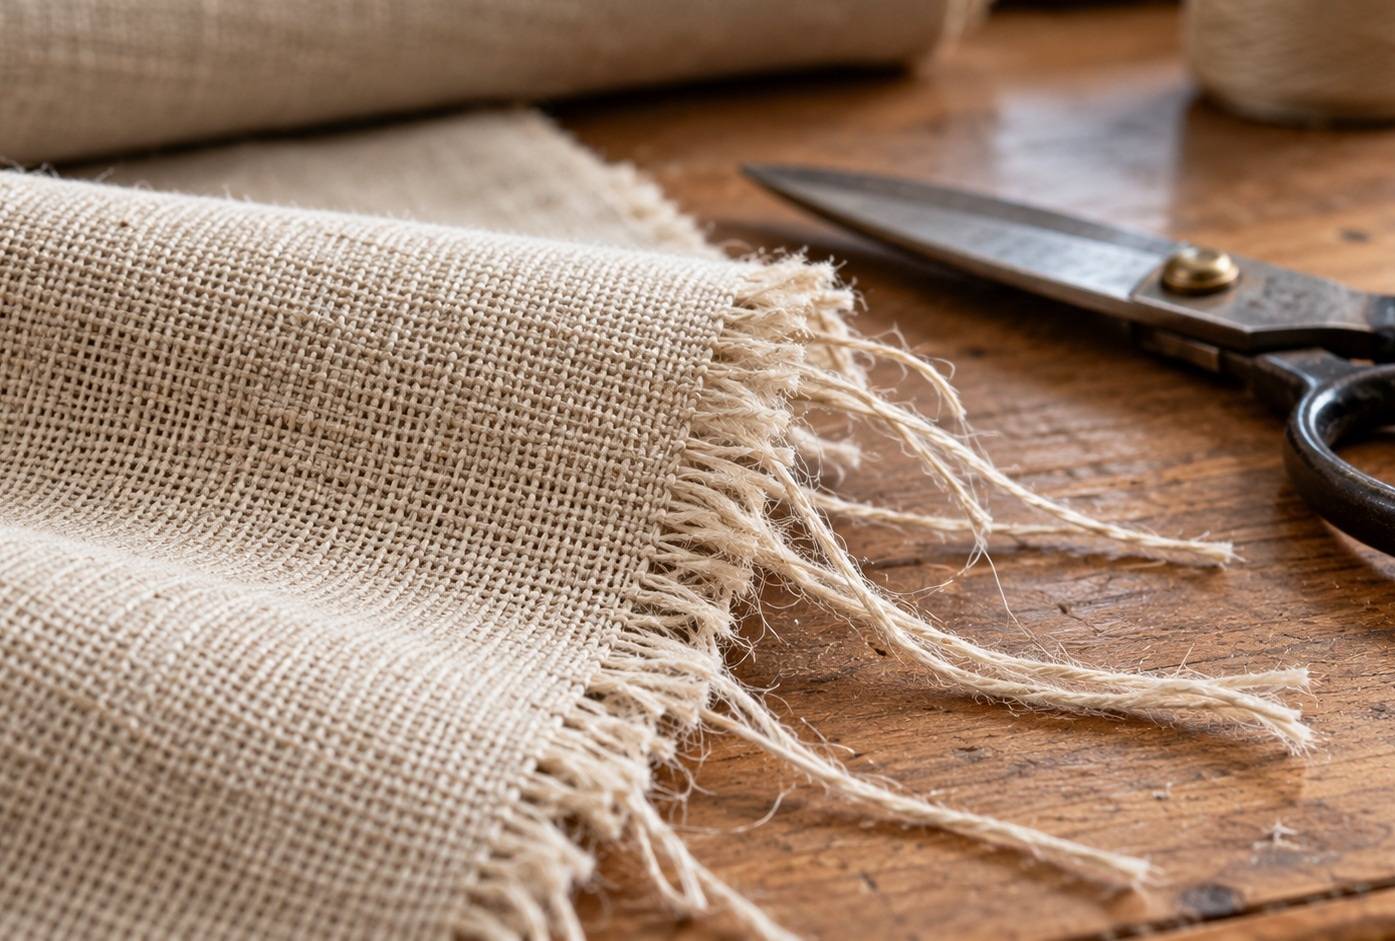
Hemp fabric can fray along cut edges, particularly when it has a loose weave or is handled repeatedly during sewing. Loose threads can make seam allowances difficult to manage and may continue to unravel during washing and everyday use.
The most effective way to stop hemp fabric from fraying is to secure or enclose its raw edges. Zigzag stitching, overlocking, French seams, flat-felled seams, and fabric binding are useful options, depending on the fabric's weight and the finished project.
This guide explains how to choose and apply each method, including options that work on a regular sewing machine without a serger.
For general fabric preparation, cutting, and stitching instructions, see our How to Sew Hemp Fabric guide.
Table of Contents:
Why Does Hemp Fabric Fray?
Hemp fabric frays because of the way woven textiles are constructed. Warp and weft yarns cross each other to form the fabric. When the material is cut, the yarns along the edge are no longer held in place by the surrounding weave and may begin to loosen.
The amount of fraying depends on several factors:
Weave density: Loosely woven hemp generally allows yarns to move more easily than tightly woven material.
Fabric construction: Plain weaves, twills, and other woven structures may behave differently along cut edges.
Handling: Repeated stretching, rubbing, or pulling can loosen threads before the seams are finished.
Washing: Agitation can increase fraying on unfinished woven edges.
Not all hemp fabrics fray equally. Tightly woven materials may hold their edges relatively well, while loosely woven fabrics can shed threads quickly.
Hemp jersey and other knitted fabrics behave differently. Their cut edges may curl or distort, but they generally do not fray in the same way as woven hemp.
Which Seam Finish Is Best for Hemp Fabric?
The right seam finish depends on the fabric's weight, weave, the project's construction, and the equipment available.
| Seam Finish | Suitable Fabrics | Equipment | Main Consideration |
|---|---|---|---|
| Zigzag stitch | Most lightweight and medium-weight woven hemp | Regular sewing machine | Simple and accessible; may need testing on loose weaves |
| Overlock finish | Woven hemp and suitable knits | Serger or overlocker | Fast, neat edge finish |
| French seam | Lightweight woven hemp | Regular sewing machine | Encloses raw edges but adds bulk |
| Flat-felled seam | Suitable medium-weight woven hemp | Regular sewing machine | Durable enclosed seam; requires additional folding |
| Bound seam | Canvas, unlined garments, accessories | Sewing machine and binding | Covers raw edges with a separate strip |
| Pinking shears | Selected stable woven fabrics | Pinking shears | May reduce fraying but does not fully secure the edge |
For lightweight woven hemp, French seams or a carefully adjusted zigzag finish are often practical choices.
For medium-weight woven hemp, zigzag, overlock, or suitable flat-felled seams can provide a clean finish without excessive bulk.
For heavyweight hemp canvas, bound seams or simpler edge finishes may be easier to manage than techniques that require several additional folds.
If you're working with thick canvas, our How to Sew Hemp Canvas guide explains how to handle bulky seams, choose needles, and manage multiple fabric layers.
How to Finish Hemp Fabric Edges: Step-by-Step Methods
The following techniques can help prevent fraying on woven hemp fabric. Before working on your project, test the selected method on a scrap with the same weave, weight and number of layers.
1. Finish Raw Edges With a Zigzag Stitch
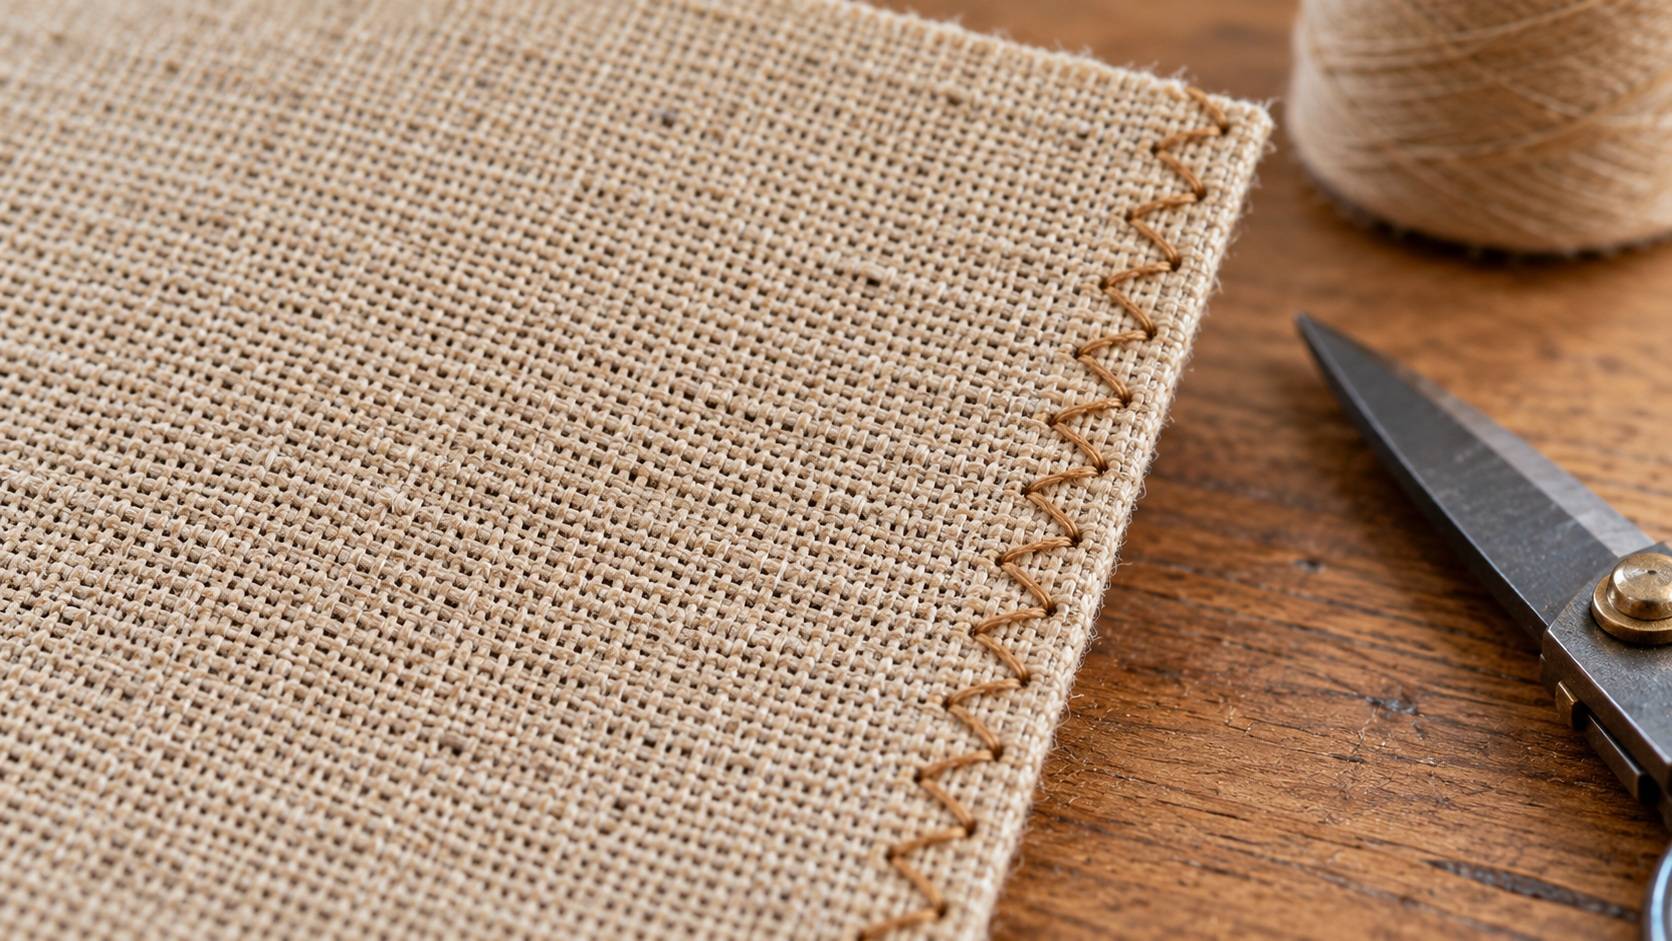
A zigzag stitch is one of the simplest ways to finish hemp fabric seams without a serger. It works on many woven fabrics and requires only a standard sewing machine with a zigzag setting.
How to do it:
Sew the main construction seam using the seam allowance specified by your pattern.
Press the seam allowances open or together, depending on the construction.
Select a medium-width zigzag stitch and test the stitch width and length on a scrap.
Stitch close to the raw edge of the seam allowance, keeping the fabric flat.
Trim any excess fabric beyond the zigzag stitches without cutting the thread.
Position the zigzag stitches close to the raw edge so they secure the woven yarns. Depending on your machine and fabric, the outer swing of the needle may pass just beyond the edge, wrapping the thread around it. Alternatively, sew slightly inside the edge and trim the excess fabric afterward without cutting the stitches.
Test the stitch width and length on a scrap to avoid puckering or curling.
Best for: Everyday woven hemp garments, pillow covers, aprons and other projects where a straightforward edge finish is sufficient.
2. Use an Overlock or Serger Finish
A serger trims and finishes fabric edges with overlocking stitches. It can produce a consistent finish on woven hemp and is useful when working on several projects or finishing long seams.
How to do it:
Check that the serger is threaded and configured for the fabric.
Test the stitch on a scrap of the same hemp material.
Adjust the cutting width and stitch settings so the threads wrap the edge without causing puckering.
Guide the fabric through the machine without stretching or pulling it.
Inspect the finished edge to confirm that the stitches secure the yarns.
A serger can finish individual seam allowances or both allowances together, depending on the project.
Keep the seam line and required allowance in mind when positioning the fabric against the cutting blade. Removing too much material can weaken the seam or change the finished dimensions.
Best for: General woven hemp sewing, garment construction and projects requiring frequent seam finishing.
3. Sew French Seams on Lightweight Hemp Fabric
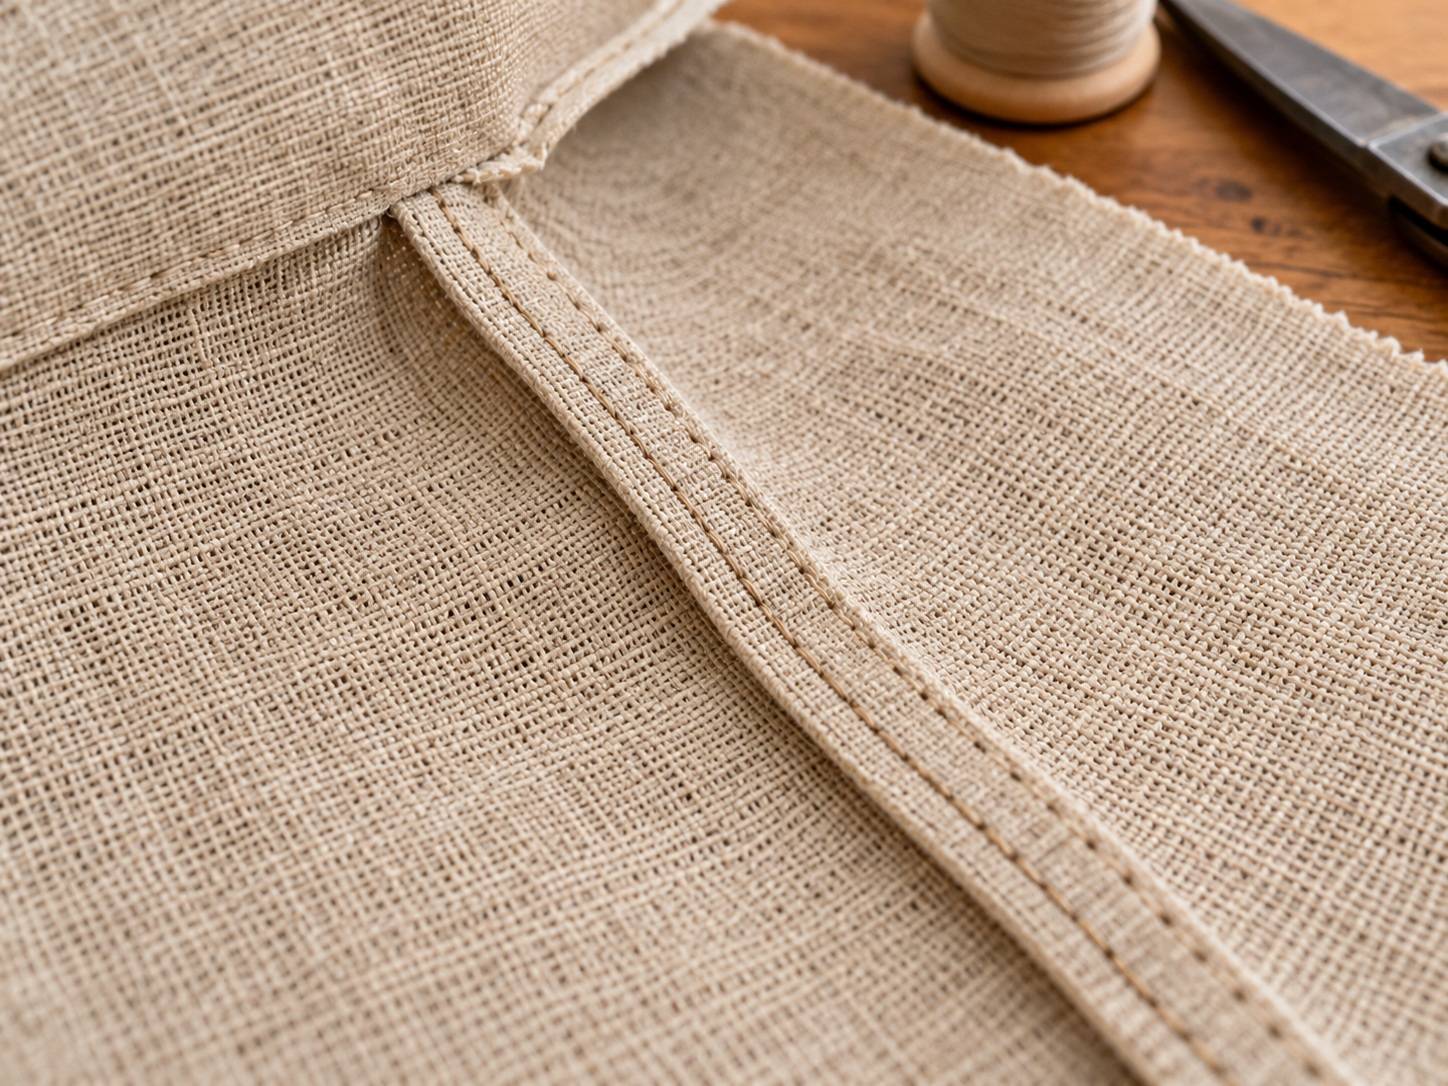
French seams completely enclose raw edges inside the seam. They are useful for lightweight woven hemp garments and projects where the inside of the fabric remains visible.
Unlike a standard seam, a French seam is sewn in two passes.
Place the fabric pieces with their wrong sides together.
Sew the first narrow seam using an allowance calculated for the finished seam.
Trim the first seam allowances carefully to remove loose threads and excess width.
Press the seam flat, then fold the fabric so the right sides face together.
Press along the first seam to create a clean fold.
Sew the second seam wide enough to completely enclose the trimmed raw edges.
Example: For a pattern with a 5/8-inch (16 mm) seam allowance, place the fabric wrong sides together and sew the first seam 1/4 inch (6 mm) from the aligned raw edges. Trim both allowances to approximately 1/8 inch (3 mm).
Fold the fabric right sides together, with the first stitching line at the folded edge. Sew the second seam 3/8 inch (10 mm) from that fold, fully enclosing the trimmed edges. Press the completed seam to one side.
Best for: Lightweight woven hemp shirts, blouses, loose-fitting garments, and selected home textiles.
French seams are generally less suitable for heavyweight canvas because the extra layers can create excessive bulk.
4. Create Flat-Felled Seams for Woven Hemp
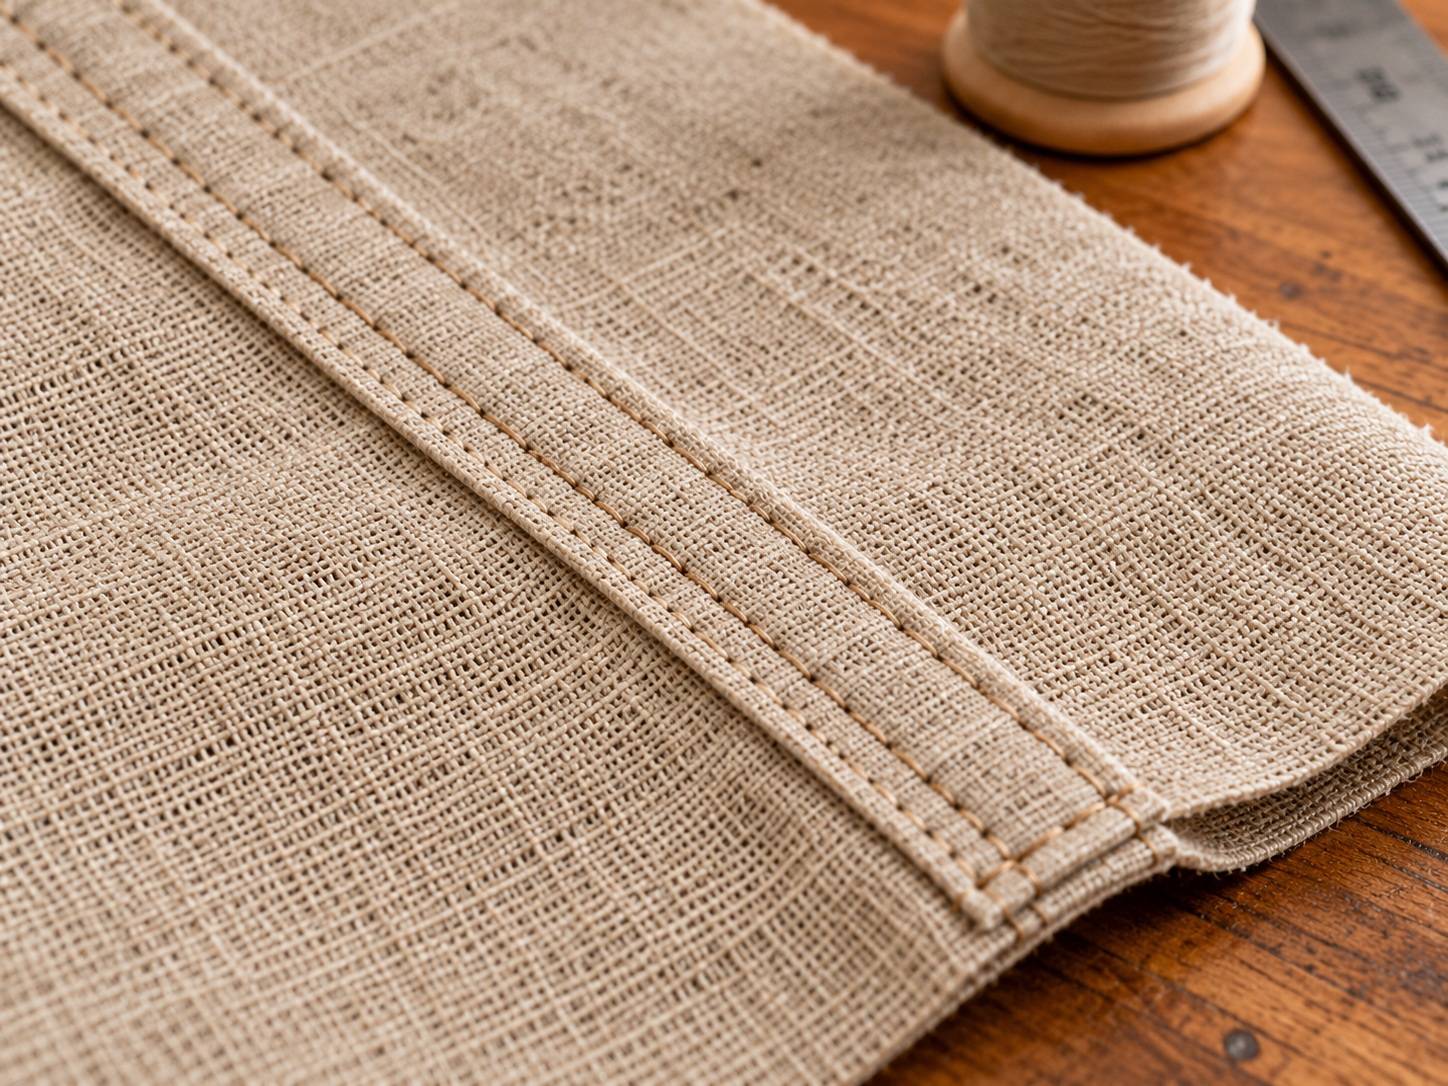
Flat-felled seams enclose raw edges and create a flat, reinforced seam. They are commonly used in garments and utility projects where a durable finish is desirable.
The technique requires folding one seam allowance around the other, then securing the folded edge with stitching.
How to do it:
Place the fabric pieces right sides together and sew the initial seam using the pattern's seam allowance.
Press the seam open briefly so the stitching lies flat.
Choose which direction the finished seam will lie, then trim one seam allowance to approximately half the width of the other.
Press both allowances toward the side where the seam will lie. Fold the longer allowance over the shorter one, enclosing its raw edge.
Turn the raw edge of the longer allowance underneath, then press the folded seam flat. Check that neither raw edge remains exposed.
Topstitch close to the folded edge, catching the folded allowance underneath. Press the completed seam.
Check that both raw edges are enclosed and that the seam lies flat without pulling or twisting the fabric.
Flat-felled seams can be useful for medium-weight hemp fabrics, but multiple folded layers may become difficult to sew in heavy canvas.
Best for: Suitable woven hemp shirts, aprons, trousers and utility garments.
5. Finish Hemp Canvas Edges With Binding
A bound seam uses a separate strip of fabric or binding tape to cover exposed seam allowances.
This technique is useful for unlined bags, structured accessories, and garments where the inside seams are visible.
How to do it:
Sew the main construction seam and press the allowances open or together, as required by the project.
Choose lightweight double-fold bias binding wide enough to cover the raw edge without pulling or twisting.
Open the binding and position it around the raw edge of one seam allowance, keeping the allowance separate from the main fabric.
Fold the binding around the edge so both sides of the seam allowance are covered. Position the slightly wider folded side underneath to help catch it with the stitching.
Secure the binding with clips, then stitch close to the folded edge through the binding and seam allowance.
Check the underside to confirm the stitching caught the binding along its full length. Repeat on the other allowance if finishing them separately.
For straight seams, suitable straight-grain binding may work. Curved edges generally require bias binding or another construction method that can follow the curve.
Avoid selecting binding that adds excessive thickness to an already bulky canvas seam.
Best for: Hemp canvas bags, unlined jackets, structured organizers, and projects where the interior finish is visible.
How to Prevent Hemp Fabric From Fraying Before Sewing
Seam finishing protects the fabric after construction, but careful preparation can reduce fraying while cutting and handling the pieces.
Staystitch Vulnerable Edges
Staystitching is a line of stitching placed within the seam allowance to help stabilize an edge before assembly.
It is especially useful around curved or bias-cut edges, such as necklines and armholes, where fabric can stretch out of shape.
Sew a line of straight stitching within the seam allowance without pulling the material.
Staystitching helps stabilize the fabric and prevent distortion. It does not secure the raw edge against fraying in the same way as zigzag stitching, overlocking, or an enclosed seam.
Finish Cut Edges Before Washing
If the fabric will be prewashed, consider securing the raw edges first.
A zigzag or overlock finish can reduce excessive unraveling during laundering. This is particularly helpful for loosely woven hemp.
Always follow the supplier's washing instructions. Some specialty fabrics should not be machine washed.
Handle Cut Pieces Carefully
Avoid repeatedly pulling, stretching, or rubbing cut fabric edges.
Keep pattern pieces flat and supported until they are sewn together. If a loose weave begins to unravel, finish the affected edges before further handling.
Leave Adequate Seam Allowances
Very narrow seam allowances can be difficult to finish on loosely woven fabrics.
Follow the pattern's instructions and check that enough fabric remains beyond the stitching line for the selected finish.
Follow the pattern's instructions and check that enough fabric remains beyond the stitching line for the selected finish.
If a fabric frays heavily, test the planned seam construction before cutting all the pieces.
Can Pinking Shears Stop Hemp Fabric From Fraying?
Pinking shears cut a zigzag-shaped edge, which can help reduce the amount of continuous yarn exposed along some woven fabric edges.
However, pinking does not lock the yarns in place. It may be sufficient for selected stable fabrics or lightly used projects, but it is less reliable for loose weaves and items exposed to repeated washing.
For washable hemp garments and accessories, a stitched or enclosed finish is generally a better choice.
Common Hemp Fabric Seam-Finishing Problems
Even a suitable finishing method may require adjustment for a particular fabric.
| Problem | Possible Cause | What to Try |
|---|---|---|
| Fabric continues fraying beyond the stitches | Stitching is too far from the edge or weave is loose | Adjust stitch placement or use an enclosed finish |
| Zigzag edge puckers | Stitch width, tension, or fabric handling | Test settings and avoid pulling the fabric |
| French seam has loose threads showing | First allowance was not trimmed enough or second seam is too narrow | Trim carefully and increase the enclosing seam width |
| Flat-felled seam is bulky | Fabric is too thick for repeated folds | Use a simpler or bound finish |
| Binding does not catch underneath | Binding is too narrow or shifts during sewing | Use wider binding and secure it before stitching |
| Knit edge becomes wavy | Fabric stretches during sewing | Avoid pulling and use a stretch-compatible finish |
If fraying continues despite adjustments, test a different finishing method. Some loosely woven fabrics are better suited to fully enclosed seams than exposed zigzag or overlock edges.
Shop Hemp Fabrics for Sewing at Hemptique
Hemptique offers natural hemp fabrics and hemp blends for sewing, crafting and DIY projects. Our selection includes materials for clothing, bags, accessories and home sewing projects.
Explore the collection to compare available fabric options and choose a material suited to your project.
Frequently Asked Questions
Does Hemp Fabric Fray More Than Cotton or Linen?
Can You Use Fabric Glue or Fray-Stop Products on Hemp Fabric?
Some fabric adhesives and commercial fray-control products can help secure small areas, but they may change the fabric's appearance, flexibility or washability. Test the product on a scrap and follow its instructions. For garment seams and frequently washed items, stitched or enclosed finishes are usually preferable.
Do You Need to Finish Every Seam on Hemp Fabric?
Not necessarily. Raw edges enclosed inside linings, facings, or certain seam constructions may already be protected. Exposed woven edges generally benefit from finishing, especially on garments and household items that will be washed.
Can You Stop Hemp Fabric From Fraying Without a Sewing Machine?
Yes. Hand overcasting or whipstitching can help secure raw edges on small projects. Binding and hand-sewn enclosed seams are also possible, although they require additional time. For heavily fraying fabric, use small, consistent stitches and test the finish before completing the project.
Sewing Tips and Safety Note
The seam-finishing methods and measurements in this guide are general recommendations. Results may vary depending on the hemp fabric's weight, weave, composition, and the sewing equipment used.
Always follow your sewing machine manufacturer's instructions and test each finishing method on fabric scraps before applying it to your project. Check that raw edges are properly secured and that the finished seams are suitable for the item's intended use.